안녕하세요 미미에요
Hi, I am Mimi.
요번에는 저번 프로젝트를 컬러보드로 활용한 패션 일러스트레이션을 그려볼께요
This time, I will draw a fashion illustration using the last project as a color board
요기 아래 영상찍어서 유트브에 올렸으니 확인해주세요! ><
I took a video and uploaded it on YouTube, so please check it out! ><
https://www.youtube.com/watch?v=6_dYkJS_-7o

저번에 밤바다를 그렸었죠?
I drew the night ocean view last time, right?
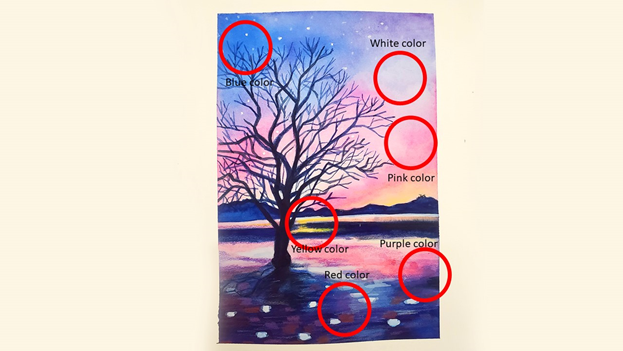
여기서 보면 핑크 블루 화이트 레드 퍼플 다양한 색상들이 보이는데요.
if you look at this picture, you can see various colors such as pink, blue, white, red, and purple.

옷을 많이 그리지 않을 거라서 색상은 핑크 블루 화이트를 선택할 거에요!
I am not going to draw a lot of clothes, so I will choose pink, blue and white.

아! 저 네일 자랑 하고 싶은데 ㅋㅋ
Oh, I want to show off my nails. LOL
컬러보드 영감받아서 네일부터 칠했어요!!!
I got inspired by the color board and got my nails done!
너무이쁘죠! 요즘 여름에 어울리는 컬러라고 생각해요! ><
It is so pretty! I think it is a color that goes well with summer these days! ><
자 이제 본격적으로 패션일러스트레이션 시작할께요.
Let’s start the fashion illustration now.
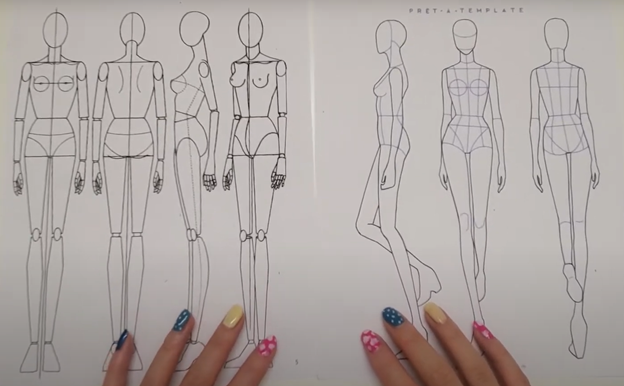
제가 디자인수업 처음 들었을때 교수님께서 주셨던 Figure인데요.
This is the figure that my teacher gave me when I first took the design class in college.
가장 기본포즈에요.
It is the most basic pose.
디자인 할때 옷이 잘보인다고 기본포즈를 강조 하셨어요!
She emphasized the basic pose when designing because clothes can be seen well!
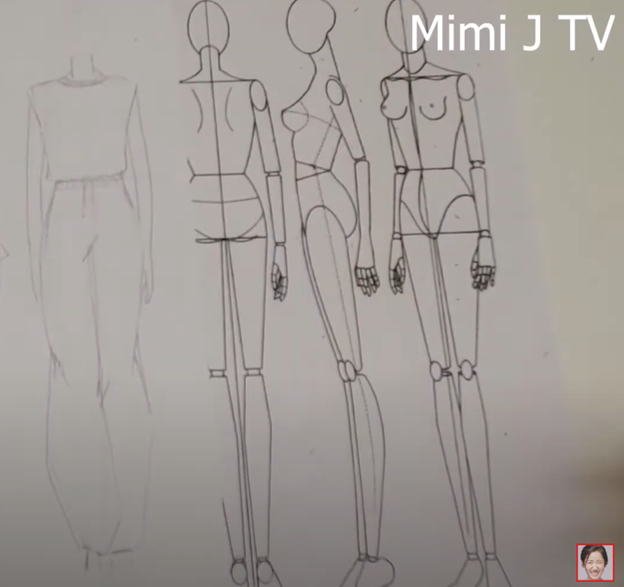
제가 사용한 피규어 플랫 다운받을 수 있도록 아래 링크 올려놓을께요!
I will put the link below so I can download the figure I used!
Free download for figure flat
https://mimi-world.tistory.com/35
Free download for figure drawing flat-패션일러스트 드로잉
패션디자인 인체 플랫폼입니다. 무료다운입니다. Please download below files for figure flat 패션일러스트레이션 기초가 궁금하다면 아래 동영상을 확인해 주세요. If you want to see fashion illustration..
mimi-world.tistory.com
아이디어 스케치할때 보통은 트랜스퍼 페이퍼를 사용하는데요.
I usually use a transfer paper to sketch ideas.
일단 저는 letter사이즈 (A4) 종이에 그려 볼께요.
First, I will draw a letter-size (A4) on the paper.

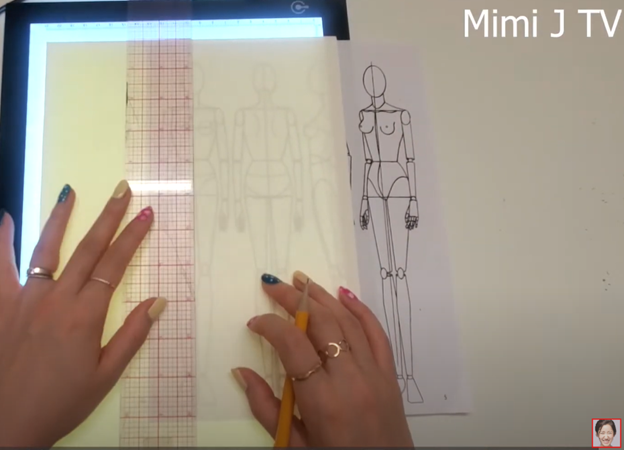
이건 라이트박스인데요.
This is a lightbox.
디자인할때 300g 이상 두께의 종이를 사용할때 유용해요!
Lightbox is useful when designing with paper that is over 300g thick.
저는 아마존에서 50불 정도 주고 샀어요.
I bought it on Amazon for about $50.

이렇게 피규어 플랫을 아래에 놓고 종이위에 외곽을 따라 그리면서 연습 해보세요.
Put the figure flat below and practice drawing along the outline of the figure flat.
물론 나만의 피규어 플랫을 만드는 것도 중요하지만 처음 패션일러스트레이션을 시작할때
연습용으로도 좋다고 생각해요 ^^
Of course, it is important to make your own figure flat, but I think it is good for practice when you first start a fashion illustration.:)

이런식으로 연습을 하면 되요 ^^
You can practice like this. :)
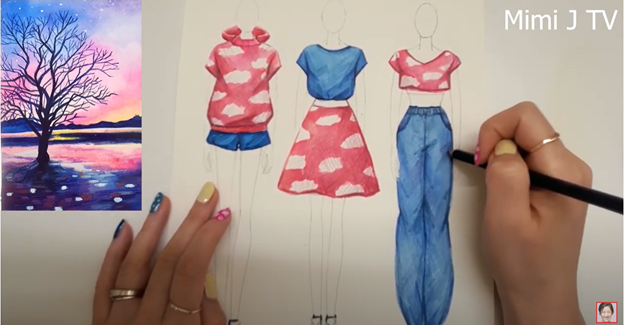
자 이제 이 피규어 플랫을 이용해서 여러가지 카테고리 디자인을 할께요.
Now, I am going to use this figure flat to design different categories.


드레스 먼저 그려볼께요.
I will draw dresses first.
그림 그리다가 촬영되고 있는 화면을 보니
그림이 잘 안보이는 것 같아서 라이트보드를 치웠어요.
I couldn’t see the picture well on the screen so I removed the light board.
캐주얼라인으로 그려줄께요.
I will draw a casual line.

지금 그리고 있는 디자인은 요가복이에요!
The design I am drawing now is a yoga suit!

후디에 반바지도 그려주고
Draw hoodie shorts

박스티셔츠에 미디스커트도 그려주고
Draw bos shirt with a midi-skirt

이번엔 민소매에 조금더 발랄한 스커트를 그려주고
This time, I am going to draw a little more lively skirt on a sleeveless shirt.

크롭탑에 조금 더 짧은 미니스커트도 그려주고
Draw a shorter mini-skirt on the crop top
마지막으로 민소매에 캐주얼바지를 그려줬어요!
Lastly, I draw casual pants on a sleeveless shirt!


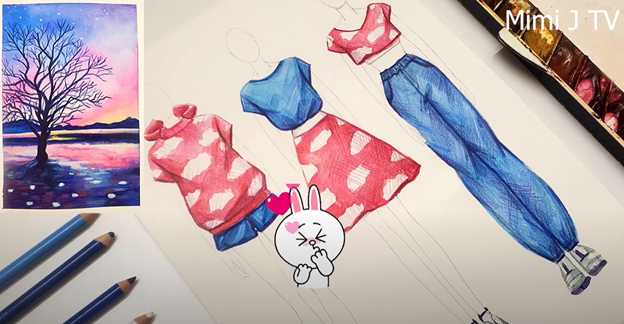
여기서 바로 스타일을 결정하는게 아니라
이렇게 부분부분 옷을 오려서 조합을 해보는 거예요.
You don’t decide the style here, but you can cut the clothes and combine them.

이렇게 3개의 룩이 결정됐어요.
Finally, these are three looks.
이제 채색할 수 있는 300g 종이에 파이널 룩을 그려줄께요.
Now I am going to draw the final look on 300g paper.

캐주얼룩 이라서 운동화를 그려줄께요
It is a casual look, so I will draw sneakers.

스캐치 끝이에요!
That is the end of the sketch!

아 아니.. 아직 옷에 패턴을 그려줄께요.
Oh, no, I will draw a pattern on the clothes.

이제 드디어 채색 시작할께요.
Finally, I will start coloring

수채화로 색을 칠하고 난 뒤 색연필로 정리를 해주면 옷의 질감을 더 잘 살릴 수 있어서 저는 색연필을 많이 사용해요~
I use colored pencils a lot because I can make the texture of my clothes better
if I use colored pencils after coloring them.
밝은색부터 어두운색으로 차근차근 밀도를 올려주세요.
Increase the density step by step from bright to dark.
마지막으로 검정색과 하얀색으로 정리 해주세요
Lastly, organize it in black and white.
지금 제가 갖고있는 하얀색 색연필이 쌓이지가 않아서… 표현이 잘 안되더라구요.
The white pencils that I have are not piled up, so I can’t express them well.
그래서 이번에 하나 주문했어요!
So I ordered one this time!
색연필 주문할겸 다른 재료들도 좀 샀는데
I bought some other materials to order colored pencils.
빨리 도착했으면 좋겠어요^^
I can’t wait to get there. :)
앞으로 더욱 다양한 프로젝트 보여드릴께요!
I will show you more diverse projects in the future!

드디어 완성!!!><
It’s finally done!! ><
오늘도 끝까지 봐주셔서 감사합니다.
Thank you for reading until the end of the post!


댓글